If you've a unit of Holux GPSmile 62 or Papago GPS loaded with Papago X3 or X5 GPS navigation software then follow the steps below to load in the latest MFM Papago Map into your device, switch to the latest map and here you go...
- Connect your Holux GPSmile 61/62 or Papago GPS device to your PC or laptop using the USB cable.
- Execute the MFM Papago map executable file
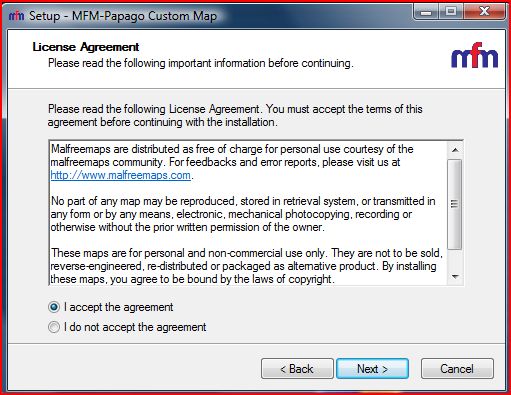
- Select your language [English], click OK, next button then accept the license agreement
- The default folder is to C:\Navi\Maps\MFM [your local hard disk], change the path to your GPS USB disk (e.g. e:\Navi\Maps\MFM091125) then click Next button
- In the dropdown list select the customized map for your Papago software (Eastgear GPS -> Eastgear X3, M3 GPS -> M3GPS Papago X3/X5) then click Next button
- Select Colorful (display colored polygons in navigation mode), then click Next button.
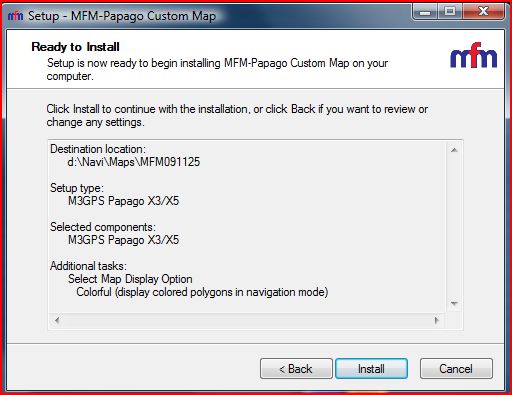
- Confirm the settings are correct, then click Install button.
- When installation completed, eject your GPS USB disk safely [use remove hardware safely of your windows OS.]
- Restart your GPS device
- Launch Papago Navigation software
- Select Map Switch, then choose the latest map that you've installed.
Refer to screen snapshoots below if you need a graphical step by step walkthrough.
a) Select language

b) Welcome screen

c) Select map display option

d) Select customized map for your Papago distributor
i) For Papago GPS devices distributed by Eastgear select Eastgear X3 (e.g. Holux GPSmile 62E, Papago R5800 distributed by Eastgear, etc)

ii) For Papago GPS devices distributed by M3 select M3GPS Papago X3/X5 option (e.g. Papago R5800 distributed by M3)

e) Select map destination

f) Accept MFM map license agreement
g) Confirm installation options
Bingo.
PF
29th November 2009